Harnessing the Power of ChatGPT-4: How We Created a Logo Writer Clone Within a Few Minutes
Artificial intelligence has been making significant strides, and the latest news is that ChatGPT-4 is out. With numerous stories of people using it to create games, pass legal and medical exams, and even launch businesses, it’s clear that AI-powered tools like ChatGPT-4 can benefit small businesses looking to improve their content or streamline their processes and systems.
Creating a Simple Logo Writer Clone with ChatGPT-4
As a child, many of us were introduced to basic computer logic through a program called Logo Writer. This educational software allowed users to enter text commands, guiding a small turtle to draw on the screen. Recognising the potential of ChatGPT-4 for creating custom software more efficiently, we decided to recreate this classic program using the AI tool.
Step 1: Laying the groundwork
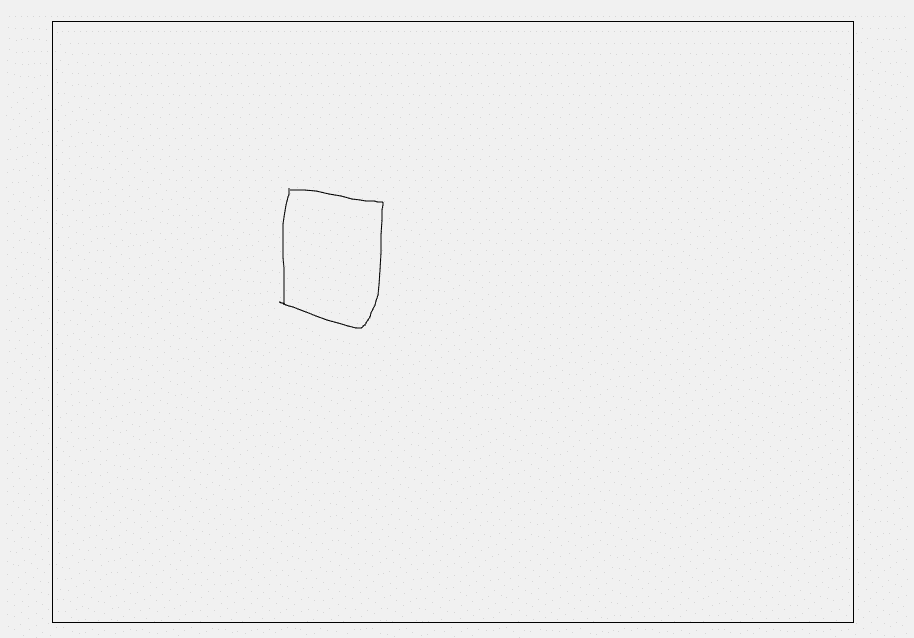
Initially, ChatGPT-4 generated a simple interface where users could draw using their mouse. While not groundbreaking, this provided a solid foundation for further development.

It produced the following code:
<!DOCTYPE html>
<html lang="en">
<head>
    <meta charset="UTF-8">
    <meta name="viewport" content="width=device-width, initial-scale=1.0">
    <title>Simple Logo Writer</title>
    <style>
        body {
           margin: 0;
           display: flex;
           justify-content: center;
           align-items: center;
           height: 100vh;
           background-color: #f0f0f0;
        }

        #drawingCanvas {
           border: 1px solid #000;
        }
    </style>
</head>
<body>
    <canvas id="drawingCanvas"></canvas>
    <script>
        const canvas = document.getElementById('drawingCanvas');
        const ctx = canvas.getContext('2d');
        canvas.width = 800;
        canvas.height = 600;

        let drawing = false;
        let x = 0;
        let y = 0;

        function startDrawing(e) {
           drawing = true;
           x = e.clientX - canvas.offsetLeft;
           y = e.clientY - canvas.offsetTop;
        }

        function draw(e) {
           if (!drawing) return;
           ctx.beginPath();
           ctx.moveTo(x, y);
           x = e.clientX - canvas.offsetLeft;
           y = e.clientY - canvas.offsetTop;
           ctx.lineTo(x, y);
           ctx.stroke();
        }

        function stopDrawing() {
           drawing = false;
        }

        canvas.addEventListener('mousedown', startDrawing);
        canvas.addEventListener('mousemove', draw);
        canvas.addEventListener('mouseup', stopDrawing);
        canvas.addEventListener('mouseout', stopDrawing);
    </script>
</body>
</html>
Step 2: Adding text commands
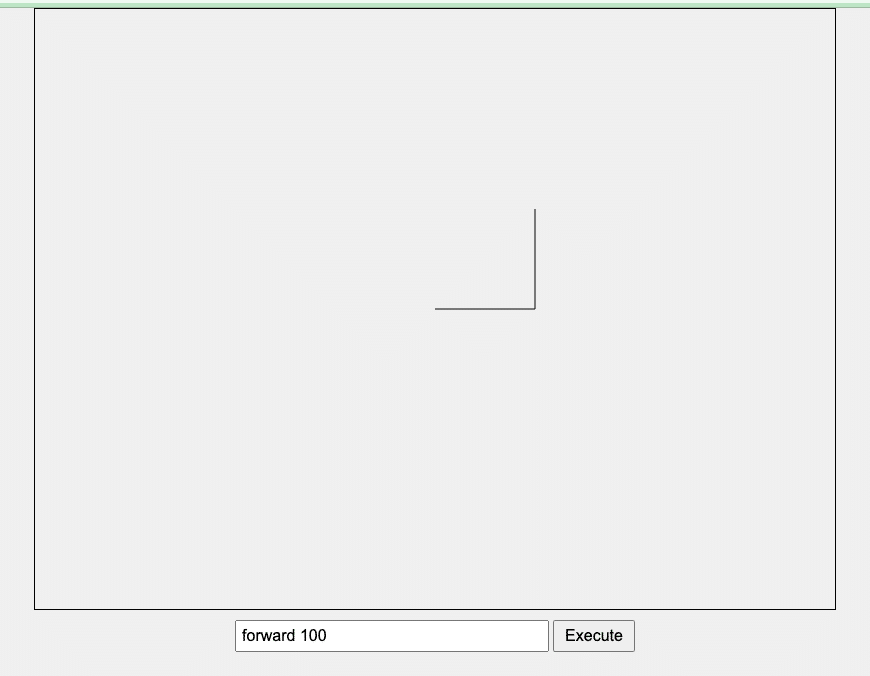
We then asked ChatGPT-4 to update the Logo Writer clone to respond to text commands. The AI tool generated an input box and a button to execute each command, making the program much more interactive.

<!DOCTYPE html>
<html lang="en">
<head>
    <meta charset="UTF-8">
    <meta name="viewport" content="width=device-width, initial-scale=1.0">
    <title>Logo Writer with Turtle</title>
    <style>
        body {
                margin: 0;
                display: flex;
                flex-direction: column;
                align-items: center;
                height: 100vh;
                background-color: #f0f0f0;
            }

            #drawingCanvas {
                border: 1px solid #000;
                margin-bottom: 10px;
            }

            input,
            button {
                font-size: 1rem;
            }

            #commandInput {
                width: 300px;
                padding: 5px;
            }

            #executeButton {
                padding: 5px 10px;
            }

    </style>
</head>
<body>
    <canvas id="drawingCanvas"></canvas>
    <div>
        <input type="text" id="commandInput" placeholder="Enter command">
        <button id="executeButton">Execute</button>
    </div>
    <script>
       const canvas = document.getElementById('drawingCanvas');
       const ctx = canvas.getContext('2d');
       canvas.width = 800;
       canvas.height = 600;

       let x = canvas.width / 2;
       let y = canvas.height / 2;
       let angle = 0;
       let penDown = false;

       function drawLine(x1, y1, x2, y2) {
          ctx.beginPath();
          ctx.moveTo(x1, y1);
          ctx.lineTo(x2, y2);
          ctx.stroke();
       }

       function executeCommand(command) {
          const parts = command.split(' ');
          const action = parts[0].toLowerCase();
          const value = parseFloat(parts[1]);

          switch (action) {
            case 'fd':
            case 'forward':
               const newX = x + value * Math.cos(angle);
               const newY = y + value * Math.sin(angle);
               if (penDown) {
                  drawLine(x, y, newX, newY);
               }
               x = newX;
               y = newY;
               break;
            case 'bk':
            case 'backward':
               executeCommand(`forward ${-value}`);
               break;
            case 'lt':
            case 'left':
               angle -= (value * Math.PI) / 180;
               break;
            case 'rt':
            case 'right':
               angle += (value * Math.PI) / 180;
               break;
            case 'pd':
            case 'pendown':
               penDown = true;
               break;
            case 'pu':
            case 'penup':
               penDown = false;
               break;
            default:
               console.error(`Unknown command: ${action}`);
          }
       }

       const commandInput = document.getElementById('commandInput');
       const executeButton = document.getElementById('executeButton');

       executeButton.addEventListener('click', () => {
          const command = commandInput.value;
          executeCommand(command);
        });
    </script>
</body>
</html>
Step 3: Enhancing the user experience
To refine the interface, we turned to ChatGPT-4 for help in adding a clear canvas button, enabling the execution of multiple commands at once, and allowing commands to run by pressing the enter key. ChatGPT-4 provided the necessary code to implement these improvements.
<!DOCTYPE html>
<html lang="en">
<head>
    <meta charset="UTF-8">
    <meta name="viewport" content="width=device-width, initial-scale=1.0">
    <title>Logo Writer with Turtle</title>
    <style>
        body {
                margin: 0;
                display: flex;
                flex-direction: column;
                align-items: center;
                height: 100vh;
                background-color: #f0f0f0;
            }

            #drawingCanvas {
                border: 1px solid #000;
                margin-bottom: 10px;
            }

            input,
            button {
                font-size: 1rem;
            }

            #commandInput {
                width: 300px;
                padding: 5px;
            }

            #executeButton {
                padding: 5px 10px;
            }
            #clearButton {
                padding: 5px 10px;
            }

    </style>
</head>
<body>
    <canvas id="drawingCanvas"></canvas>
    <div>
        <input type="text" id="commandInput" placeholder="Enter command">
        <button id="executeButton">Execute</button>
        <button id="clearButton">Clear</button>
    </div>
    <script>
        const canvas = document.getElementById('drawingCanvas');
        const ctx = canvas.getContext('2d');
        canvas.width = 800;
        canvas.height = 600;

        let x = canvas.width / 2;
        let y = canvas.height / 2;
        let angle = 0;
        let penDown = false;

        function drawLine(x1, y1, x2, y2) {
            ctx.beginPath();
            ctx.moveTo(x1, y1);
            ctx.lineTo(x2, y2);
            ctx.stroke();
        }

        function executeCommands(commands) {
            const commandList = commands.split(';');
            commandList.forEach((command) => {
                const trimmedCommand = command.trim();
                if (trimmedCommand) {
                    executeCommand(trimmedCommand);
                }
            });
        }

        function executeCommand(command) {
            const parts = command.split(' ');
            const action = parts[0].toLowerCase();
            const value = parseFloat(parts[1]);

            switch (action) {
                case 'fd':
                case 'forward':
                    const newX = x + value * Math.cos(angle);
                    const newY = y + value * Math.sin(angle);
                    if (penDown) {
                        drawLine(x, y, newX, newY);
                    }
                    x = newX;
                    y = newY;
                    break;
                case 'bk':
                case 'backward':
                    executeCommand(`forward ${-value}`);
                    break;
                case 'lt':
                case 'left':
                    angle -= (value * Math.PI) / 180;
                    break;
                case 'rt':
                case 'right':
                    angle += (value * Math.PI) / 180;
                    break;
                case 'pd':
                case 'pendown':
                    penDown = true;
                    break;
                case 'pu':
                case 'penup':
                    penDown = false;
                    break;
                default:
                    console.error(`Unknown command: ${action}`);
            }
        }

        const commandInput = document.getElementById('commandInput');
        const executeButton = document.getElementById('executeButton');
        const clearButton = document.getElementById('clearButton');

        function clearCanvas() {
            ctx.clearRect(0, 0, canvas.width, canvas.height);
        }

        executeButton.addEventListener('click', () => {
            const commands = commandInput.value;
            executeCommands(commands);
        });

        clearButton.addEventListener('click', () => {
            clearCanvas();
        });

        function handleKeyDown(event) {
            if (event.key === 'Enter') {
                event.preventDefault(); // Prevents submitting the form (if it's inside a form)
                const commands = commandInput.value;
                executeCommands(commands);
            }
        }

        commandInput.addEventListener('keydown', handleKeyDown);

    </script>
</body>
</html>
Step 4: Testing the program
Lastly, we asked ChatGPT-4 for a command to draw a simple house in the input field.
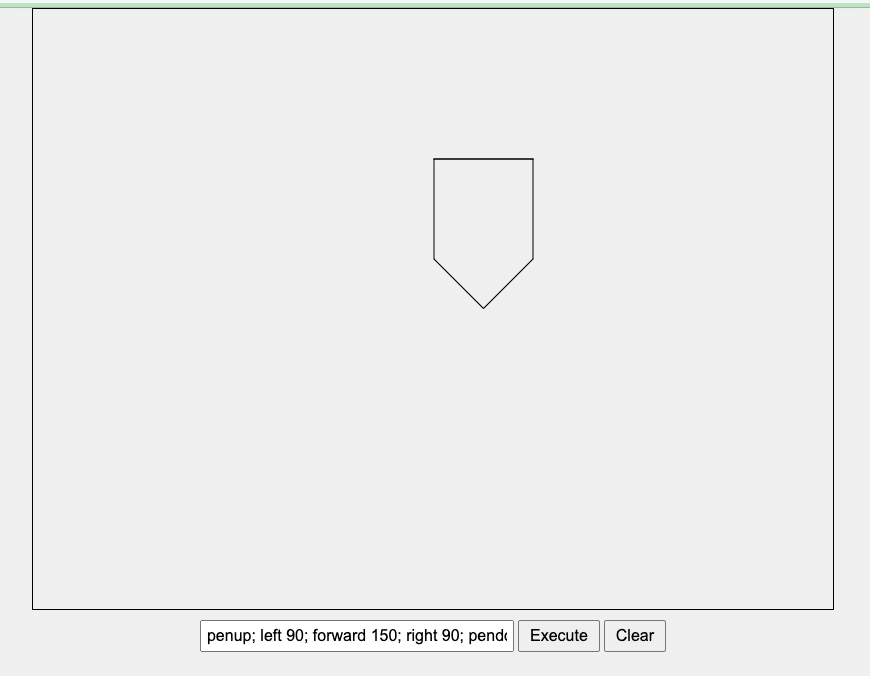
penup; left 90; forward 150; right 90; pendown; forward 100; right 90; forward 100; right 45; forward 70; right 90; forward 70; right 45; forward 100; right 90; forward 100
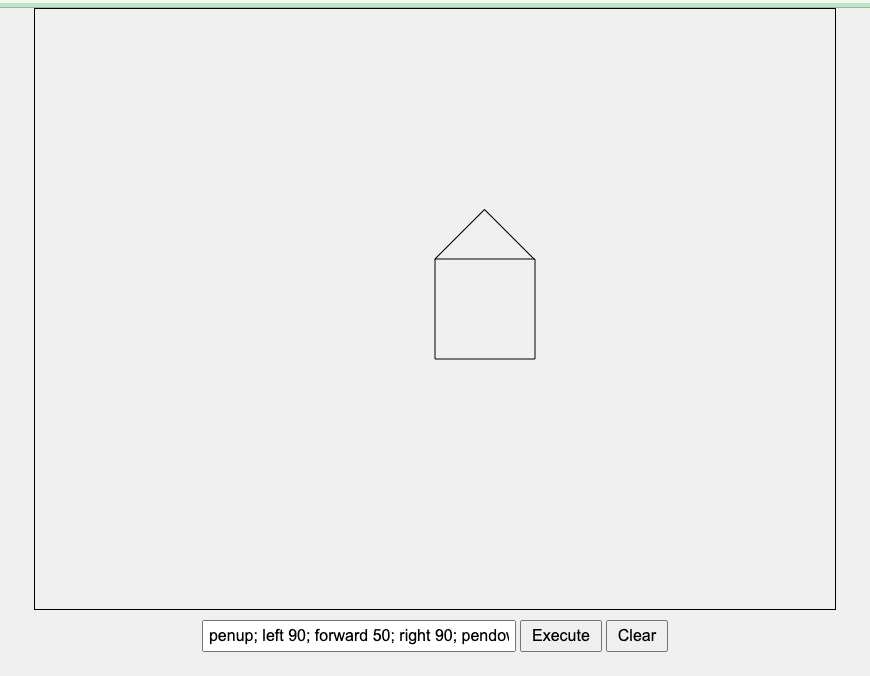
Although it initially provided a command that resulted in an upside-down house, ChatGPT-4 quickly corrected the mistake upon notification.
penup; left 90; forward 50; right 90; pendown; forward 100; right 90; forward 100; right 90; forward 100; right 90; forward 100; right 45; forward 70; right 90; forward 70; right 45
The final product, a basic Logo Writer clone, showcased the potential of ChatGPT-4. The final version can be found here.
The commands to operate the program are:
• penup or pu – stop drawing. It allows movement without creating any lines.
• pendown or pd – start drawing. When moving, it creates a line.
• forward or fd – moves forward by the number of pixels, e.g., fd 100.
• backward or bk – moves backward by the number of pixels, e.g., bk 100.
• left or lt – turns left by the number of degrees, e.g., left 90 turns left by 90 degrees.
• right or rt – turns right by the number of degrees, e.g., right 45 turns right by 45 degrees.
Colclusion:
ChatGPT-4 completely exceeded our expectations, enabling us to create a basic Logo Writer clone in just a few minutes. It’s evident that ChatGPT-4 has the potential to significantly enhance operations for small businesses ready to adopt this technology, enabling them to optimise processes, streamline reporting, and gain a competitive edge over their rivals.
As a web development and custom software development Australian small business, we are excited to explore how AI-powered tools like ChatGPT-4 can enhance our services and deliver better results for our clients.
By harnessing the power of ChatGPT-4, we can create more engaging and efficient solutions for small businesses looking to improve their web presence, streamline processes, and develop custom software solutions.
Contact us today and don’t miss out on the potential of AI-driven development; reach out to our team to learn more about how we can help you achieve your business goals.
